Quick Navigation
A lot of people cannot afford to hire a handyman to do a custom security camera housing job. And we also have those people that just like to do that handiwork themselves especially when it is a simple job like security camera housing.
When looking at do-it-yourself projects this one is something that should not be too difficult for the majority of people to do in their own home so whether you are trying to be a little frugal or you just love to do these projects yourself we are going to go through and help you create a security camera housing using some of the techniques that I have personally used to create my housing and that I have used for clients when they have contacted me for their installations.
Feel free to follow with us if you have the necessary materials but also keep in mind that if you are not at least a novice to intermediate do-it-yourselfer this may not be for you and maybe a little too complicated. Your best bet, in this case, may actually be to hire someone to help you so you do not waste any time and spend too much on materials.
What You Will Need to Prepare
1. Two Types of Plywood. 3 to 4 pieces of plywood are enough. There should be 1 short and 2 long pieces of plywood.
2. A Sheet of Cardboard. You will need this to draw shapes for you to quickly trace your security camera housing to the sheet metal
3. A Marker or Any Tracing Medium. A tracing medium is a must, for you to draw the shape of the camera to cardboard and sheet metal.
4. A 12 x 8 Inch Sheet Metal. This will serve as the body of your camera housing. Depending on the size of your camera, you can buy a much smaller or larger one.
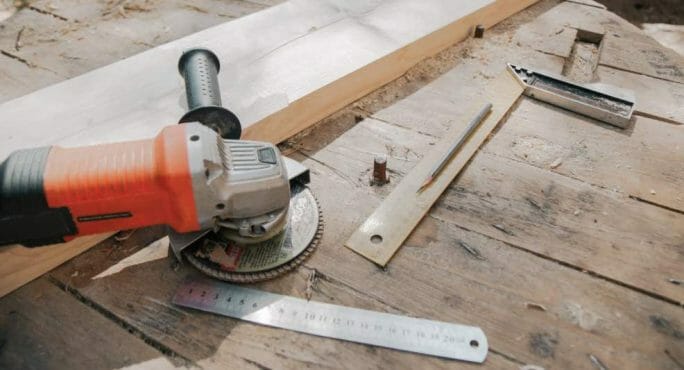
5. Heavy Duty Metal Cutting Shears. These metal cutting shears will help you easily cut the sheet metal into shape to form your security camera housing.
6. Construction Adhesive. A construction adhesive will hold your sheet metal into shape.
Step 1
You can start by making a quick stand using scrap pieces of plywood. Make some holes to mount the camera. You can trace the shape of your camera here easily.
Step 2
Use a sheet of cardboard to draw the side profile of the camera. It would be best if you always remembered to accommodate an extra half-inch to make sure the camera has enough space.
Step 3
You will need to cut the previously traced shape out of the cardboard. This way, you can carve the form out of the metal sheet easily using cardboard.
Step 4
As you carve the shape to the metal sheet, do not forget to put an extra line at the side, which is about an inch long. This will serve as the space where you mount the screws.
Step 5
Mark out the shape into the metal sheet, and try to duplicate the shape below.
Step 6
Use a cutting tool to cut the shape out of the metal sheet.
Step 7
Take your gloves with you to avoid injuries and start bending the metal sheet into shape. Use a piece of plywood to help you hold down the part of the metal sheet that you don’t want to bend.
Step 8
Regarding the bending directions, you should bend the triangle tab sections of the camera into the directions on the drawing, bending inwards. However, the side flares need to be bent in the opposite direction. But before you turn it, you should cut the middle section of the flare and bend it in the same direction as the other shapes. See the image below to see what the end result should look like.
Step 9
Now, you should bend the side and wrap the roof section around the triangular tabs. Then, hold the shape together or use a clamp to adjust it.
Step 10
For you to bond the metal together, use a construction adhesive. You may also use tape to have a much cleaner or easier to clean output.
Bare in mind that you need to be aware of the amount of adhesive you apply and it should be applied where metal is in contact with metal.
Step 11
Once you are done putting on the adhesive. You can hold it together while you clean any extra adhesive residues that are not in accordance with the shape.
Step 12
Finally, check if the metal sheet or the shape is well bonded. Try to put some force on it to test its durability. After that, make holes on the side flares; this is where you mount the screws.
Step 13
You may use sandpaper to sand down the edges of the camera housing for your safety. You can also apply paint to it in the color you prefer to make it look more aesthetic. One great idea is to use corrosion-proof pains to make sure that the metal never gets oxidated.
Step 14
You may now proceed and drill holes into your wall. These holes are where you mount the screws.
Step 15
Lastly, you can screw the camera to the roof using the previously made holes.
What are the benefits of housing your security camera?
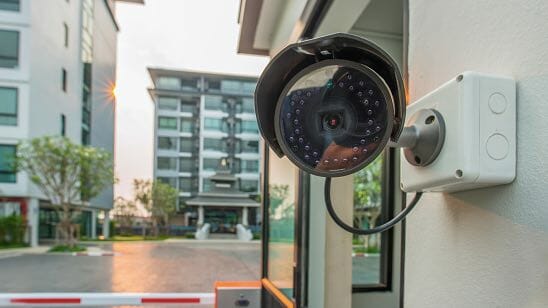
- It can prevent thieves from stealing, vandalizing, or blinding your security camera.
- You can keep your security cameras free from spider webs, bugs, or insects
- It can protect your camera from the weather, whether it’s a chilly winter, a hot summer, or rain.
- Reduce the risk of lightning and power surges causing electrical damage to security camera systems.
- Camera housing can keep your cameras from fogging, clouding, or condensation.
To Buy or To Build? (Advantages & Disadvantages)

Thieves and burglars can easily tamper with your security camera when it’s unhoused. That is why it has to have its housing. Ready to install camera housing is available, but the market price is pretty high. That is why we opt into building them.
With the simplified steps I’ve shown here, you can hide your security camera from being tampered with.
Advantages of Building a Camera Housing
- It is less expensive than buying them from the market. You can buy the DIY materials at a cheaper price and piece by piece.
- You may quickly delete or reposition it if you need to upgrade to a newer version. There’s no need to deal with electrical lines and risk electrocution anymore. (1)
- There are no contracts or subscriptions to sign. You will not be required to sign a long-term agreement or pay a monthly charge, aside from your device’s power consumption. (2)
- You can quickly install a new one when it gets broken due to different weather conditions.
Disadvantages of DIY Camera Housing
- The functionality may be limited. They are prone to improper installation. You may check the video from the reference to make sure that you can follow the steps properly.
- It is your responsibility to make repairs. When you make a system on your own, you are frequently on your own. Upcoming repairs and expenses are both your responsibility and liability.
If you have gotten this far I congratulate you and hopefully your far enough along and have created your own security camera housing.
References
(1) electrocution – https://www.sciencedirect.com/topics/medicine-and-dentistry/electrocution
(2) power consumption – https://green.harvard.edu/tools-resources/poster/top-5-steps-reduce-your-energy-consumption