
Quick Navigation
You can build an aluminum security screen by making a frame using an aluminum screen frame kit and adding a fiberglass screen to it using a rubber spline and a spline roller.
If you wish to build a wooden security screen, all you need to do is build the frame, add a fiberglass screen using a staple gun and finish it with screen mold.
Contrary to what you might think, you don’t need to call a carpenter to build a security screen for your window. Using a few cheap tools, you can build one yourself in less time than it would take to call in a professional. But since you’re here, you probably already thought you could build a security screen yourself, so without further ado, let’s jump right into it.
Things you will need for this job
- Aluminum Screen Frame Kit
- Rubber Spline (might be included in the kit)
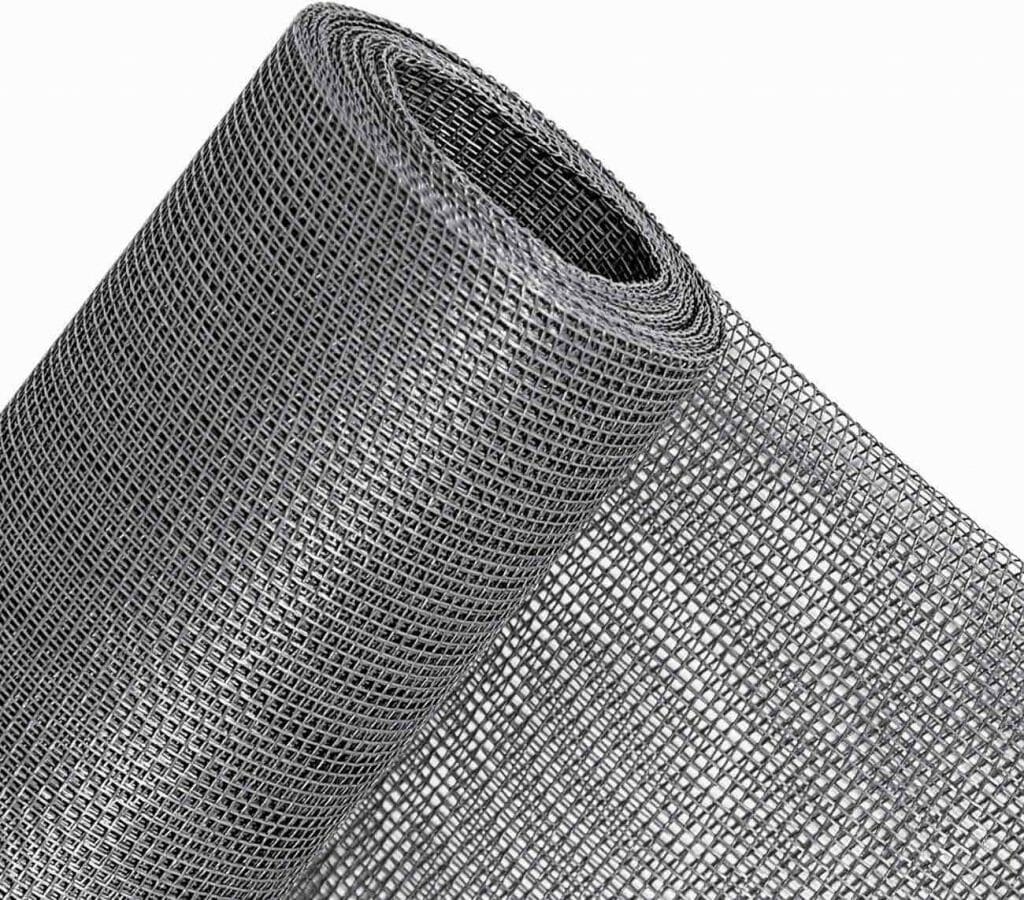
- Fiberglass Sheet (might be included in the kit)
- Measuring Tape
- Mitre Box
- Spline Roller
- Hacksaw
- Pocket Paper Cutter
You might be asking, “Wait, Aluminum Screen Frame Kit? What if I want to build a wooden frame myself?” If this is the case and you wish you build the frame yourself, the only materials other than those needed to build a wooden frame are;
- Fibreglass Sheet
- Staple Gun
- Screen Mold
- A pair of scissors
Whether you use the aluminum kit or make a wooden frame yourself, we have got you covered. First, we go into the process of making a DIY security screen using the aluminum kit, and then we go discuss the process of making a wooden DIY Security Screen.
Aluminum DIY Security Screen
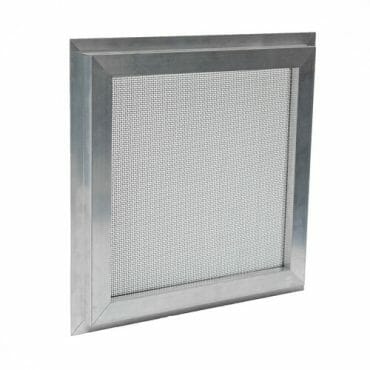
The materials used in the screen itself will cost you around $16, which makes it quite inexpensive. If you do not have any of the required tools buying all of these, including the screen supplies, will cost you about $37.
The frame kit can make a 48-inch by 48-inch frame, but you can resize it to the size of your window using a hacksaw.
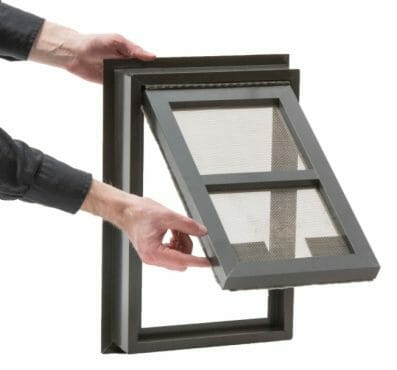
In the following steps, I’ll show you how to build a window security screen frame and how to place the fiberglass mesh. (1)
Measure
The first step is to get accurate measurements of what your security screen should be. If you have a security screen that you wish to replace, you can measure its dimensions to build your frame.
If you don’t have an old security screen, here’s what you have to do. You have to measure the dimensions of your window and subtract 1.5 inches from the height and width measurements. This is to accommodate for the width of the frame contours.
Cut
Once you have measured the width and height of your window and have accommodated the width of the frame contours, you can use the miter box and the hacksaw to cut the aluminum frame to the appropriate length.
Measuring and cutting the frame accurately is really important since one of the reasons you might be building a security frame instead of buying one is so you can have a frame that exactly matches your window. It pays a lot to be a little more careful with measurements and cutting.
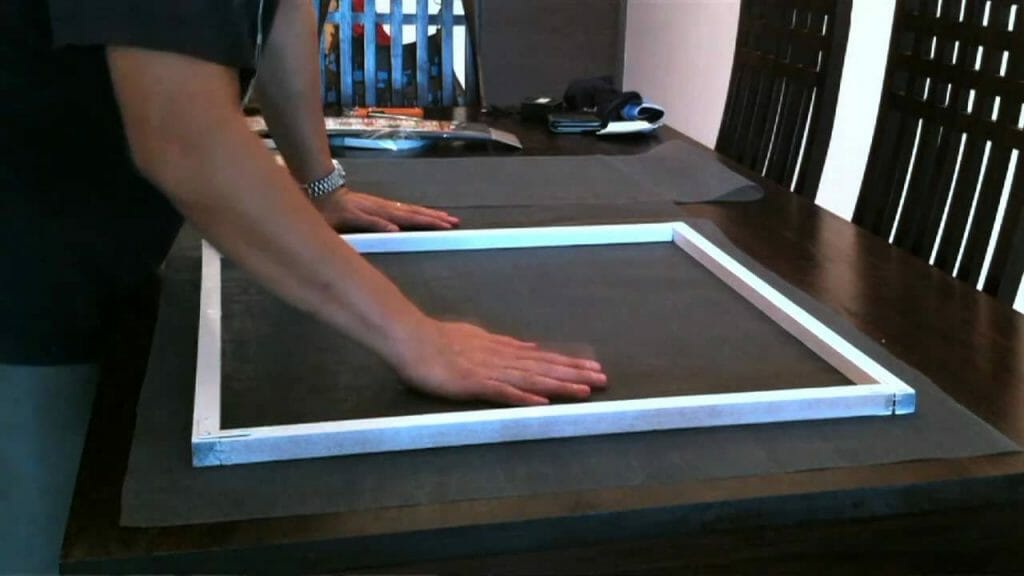
Join the Sides Together
Once you have the sides of the frame cut to the appropriate length, you are ready to join the sides together using the frame corners.
Before you join the sides together, make sure there is a recess in the frame for the rubber spline to go. The recess should be facing up towards you for all four sides.
It is really important to get these steps right in order to avoid errors and redos and to save time. In these three steps, we focused on building the frame. Now we are to move to add the fiberglass.
Add Fiberglass Screen
Once the frame is ready, you can add the fiberglass screen to the frame. I found it best to divide this step into several sub-steps. Here is how you can add the fiberglass screen to the frame.
- Lay the security screen frame on a flat surface such that the recess in all the sides is facing up towards you. If only some of them are facing you, please refer to step 3: “Join the Sides Together.”
- Roll out some of the fibreglass screens on top of the frame. The fibreglass screen should be a few inches wider than the frame on all four sides.
- Place the rubber spleen on the top of the fibreglass screen and the frame directly above where the recess is.
- Use the spline tool (that looks like a pizza cutter) to insert the rubber spline into the recess. This will fix the fibreglass screen to the frame. (Admittedly, this part is really fun to do) (2)
- Cut the excess fibreglass screen using the pocket paper cutter. The best way to do this is to hold the cutter at a 45-degree angle to the frame and cut the fibreglass mesh.
- Push in the rubber spline with the spline tool one more time to ensure the screen is tightly fixed.
Once you buy the spline tool and learn how to do this, I’m sure you’d want to replace all the old fiberglass screens in your window frames.
Wooden DIY Security Screen
Assuming you know some woodwork, making a wooden security door is a piece of cake. Making your own wooden security screen also allows you to vary the sturdiness of your security screen by choosing different widths and types of wood and adding a different number of screen molds.
Here are the steps to making a wooden security screen.
Make the Frame
We start with making the wooden frame. Measure the dimensions of your window and make a frame of the appropriate size. The frame could be made of wood beams of any thickness, depending on your preferences.
Add the Fiberglass Screen
Once the frame is ready, you can add the fiberglass screen. Layout the fiberglass sheet on top of the frame and use the stapler gun to fix the fiberglass screen in place. Make sure you keep pulling the fiberglass screen, so it stays tight. Place staples one inch from each other all around the frame and fix the fiberglass screen to the frame. Now, use a pair of scissors to cut the fiberglass screen on the sides, only leaving enough that it can be hidden with the screen mold.
Nail-in the Screen Mold
Once the fiberglass screen is tightly in place, you can place screen molds on top of the staplers. Apply PVA glue all around the frame on top of the staplers. Now use nails to place the screen molds on top of the glue, hiding the staplers and the loose fiberglass screen. Once the glue dries, your security screen is ready.
You can easily build a security screen at home that does not take a lot of time and is very cost-effective. There are two types of security screens you can build: aluminum security screen and wooden security screen. An aluminum security screen takes less time, is easier to build, and may cost less than a wooden security screen, but a wooden security screen may be stronger. Whichever one you choose to build, if you follow the instructions provided here, you will have built a professional-quality security screen spending less time and less money.
References
(1) fiberglass – https://cen.acs.org/materials/inorganic-chemistry/s-fiberglass-does-delicate-material/96/i38
(2) pizza – https://www.britannica.com/topic/pizza