
Quick Navigation
- 1. Secure The Window Using A Window Grill
- 2. Mount Exterior Security Bars On The Window
- 3. How To Make A Window Security GrillE
- 4. Welding Security Bars Without The Use Of Jigs
- 5. How To Make Cheap Window Bars
- 6. Install A Grisham Window Bars
- 7. Making Spiderweb Security Bar Unit For Window
- 8. Installing Security Bars In The Basement Window
- 9. DIY Burglar Bars For Home Windows
- 10. Creating And Installing Security Bars On The Windows
- 11. Securing Windows
- Wrapping Up
Home Security is a concern for a lot of people. With rising burglary cases, it is important that we pull out all the stops to ensure the safety of our home. One of the most effective ways of doing that is by installing security bars.
Thankfully, you can make DIY security bars and protect your assets from burglary quickly and easily. While doing this project, the focus is to barricade all the entry points in your house, and this includes all the doors, windows, or any other kinds of entryways. Here are 11 DIY tips that will help you defend your home a lot better.
Here is a summary of how you can secure your home’s windows:
- DIY window grille
- DIY security bars on the window
- Welded Security Bars
- DIY Burglar bars for windows
- Securing windows
- Installation of Grisham Bars
1. Secure The Window Using A Window Grill
Burglars largely target windows to get access to a house. It is crucial that you put up a window grill on all the windows in your house, however big or small.
You can make a window grill with steel bars.
Cut the steel bars to the length of the window’s length and breadth. Weld the bars together to make a steel square that matches the size of your window.
Then, use a few vertical steel bars and weld them to the steel bar on either end. You can use cylindrical steel to create whatever design you want for the window grill.
See the video below:
2. Mount Exterior Security Bars On The Window
You can also install security bars on the windows, on the outside. This won’t take you long, although, to get the job done, you’d need to have some basic handyman skills. If you don’t think you’re up for the task, you can get help from someone who has some prior experience.
Once you’ve bought the ideal security bars for your windows, you’d have to mount the exterior bars on the window frame. This would give the windows that extra bit of security. For this, you’d need security bars that match the size of the window.
Then, you’d have to position the security bars in the places you want them installed, both horizontally and vertically. Once you’ve properly positioned them, drill the holes in the mounting brackets. Before drilling, mark the spots where you want to make the cavity so you get things right on the first try.
Then install the bars, and use a non-reversing safety screw to secure the bars onto their places. If the mounting surface is made of brick or stone, then you’d have to drill a larger hole, big enough for a screw anchor. For the inside grills, you’d have to make the system in such a way that you can open the grill from the inside. For this, you could get an installation kit consisting of the bolts and tools you would need for installation.
3. How To Make A Window Security GrillE
You can also make a window security grille to barricade the window for security. However, for this project, you’d require a more heavy-duty tool, as you’d be required to make large holes on the metal surface.
Purchase 4 bars of steel and drill holes in them.
Then, connect the edges of the bars, then add the railing between the bars.
You can make the railings out of cylindrical rods of metals. (1)
Weld both the rods and the bars and finish up making the grille.
See the video below:
4. Welding Security Bars Without The Use Of Jigs
Welding security bars using jigs is easy, but you can still get the job done if you don’t have it. However, you’d have to put in some extra effort.
Grab two pickets, and place them vertically parallel to each other on a plain surface.
Then grab two crossbars, place them horizontally parallel to each other, with six-inch gaps between them and the ends of the vertical bars, and then draw a mark.
Repeat the same for the other crossbar too.
Now, remove the horizontal bars off of their places, and hold just the vertical pieces in position.
After this, place a few pickets with equal width between them, horizontally on top of the vertical pieces, to hold the bottom pieces down and prevent them from moving.
Once you’ve put all the pieces in their positions, you can begin the welding process.
See the video below:
5. How To Make Cheap Window Bars
If you’re low on cash and want to go for a budget option to put up security bars in your house, then you could consider building cheap window bars.
For this, you would need nine-gauge galvanized wire, which you can get from any farm store.
Place it on a plain surface, and make hooks on the ends of the wire.
You can fasten the wires to the frame and attach the frame to the window using the hooks.
See the video below:
6. Install A Grisham Window Bars
Installing Grisham window bars is pretty simple, and you don’t have to be an expert to get this right.
First, you’d need to install release hinges along the horizontal tube of bars of the window, then with the window unit in the center, draw the markings on the hinge brackets with a marker.
You’d then have to do some drilling on the locations of the hinge bracket and put non-reversing safety screws in place.
Take measurements of your window, including its height and width.
Fasten the screws, and install the latching bullets.
Survey the surface, and mark the center-most location.
You’d also have to mark the spots above every latching bullet, as it would indicate cable feed’s holes locations.
Start drilling at the exit point of the interior wall to make a downward slope.
Repeat the exercise with a short cable whose lock body is at the bottom.
Secure and install the cable clam standoff, the screw, and the cable cover. On the flat portion of the standoff, put a spiral cable shield, and draw appropriate markings.
Fasten the cable shields onto the cable clamp. A few more tightened and you’re done.
See the video below:
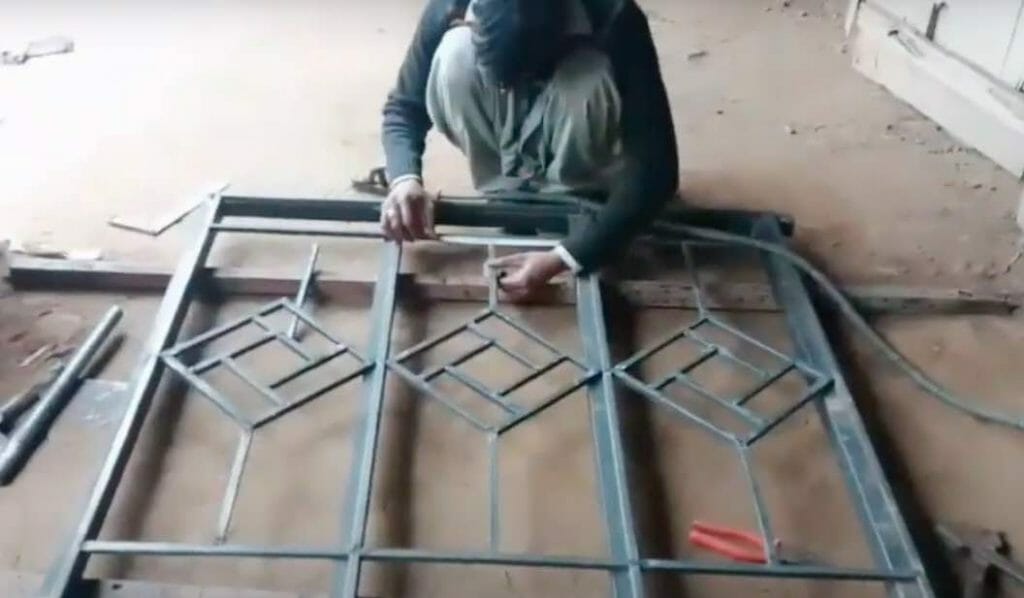
7. Making Spiderweb Security Bar Unit For Window
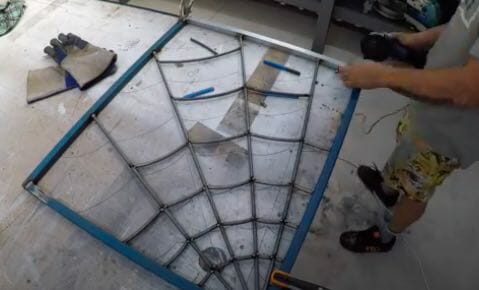
This is a bit of an outlier but If you want your security bars unit to look a little different, you can make a custom spiderweb security bar unit, which will not only look really cool but also provide stronger security than any of the other grill designs. However, this grill would require more of your time and effort due to the intricacy of the design. For this, you’d first have to take the measurement of the window you want to install the unit on. You could also draw the pattern you want to create on paper before beginning the project. It would give you immense clarity on how you should proceed. Then begin cutting four metal bars in equal lengths. (2)
Weld the bars together, forming a square. Cut the metal pieces that would go within the square so that it matches with the rough sketch of the pattern you’ve drawn. Weld all the pieces together within the square. You can use crossbars or even cylindrical steel to cut and weld to form the pattern. Once you’re done with all the welding, you can finish off the project by painting the unit. Install the unit on the window when everything is done.
See the video below:
8. Installing Security Bars In The Basement Window
A basement is a prime location from where a burglar could enter your house. Putting up security bars here is very effective. You would have to purchase four steel bars for the basement windows, two long and two short. Take the short bars and fasten them with each other. Next, begin spacing the bars from the middle, take measurements, and draw suitable markings.
Once this is done, you would have to drill deep holes, preferably of ⅞” at each of the markings that you drew. Use a chop saw and chisels to make a tenon and mortise system. You’d have to cut electrical conduit while filling spray foam at each of the sides. Now, link both the long bars and one short bar. Put the foam-filled ends in place. Fill the opposite end of the bar with the spray foam too. Install the other bars on the drillings as well and finish up by installing the entire structure. (3)
See the video below:
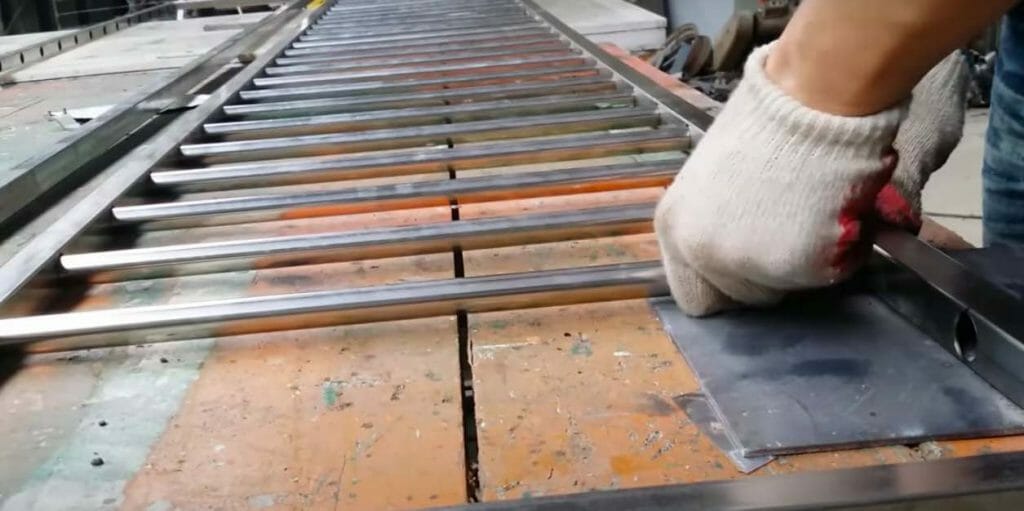
9. DIY Burglar Bars For Home Windows
For this, you’d first need to measure the height and width of the window. Then, you’d have to buy metal bars that match the measurement of the window. You can also cut long metal bars using the appropriate tool and make custom-sized bars.
Then place the bars vertically and horizontally to make a grill-like structure out of the metal bars. Once you’ve positioned all the bars, weld them together.
Place the security bar unit on the windows, and mark the spots where you would be required to fix the screws to install the unit. Start drilling holes on all the marked spots, then place the unit back on and fasten it to the window. Consider using long screws to install the unit, so the screws can be drilled deep, and you’d know that it has been fixed properly in place.
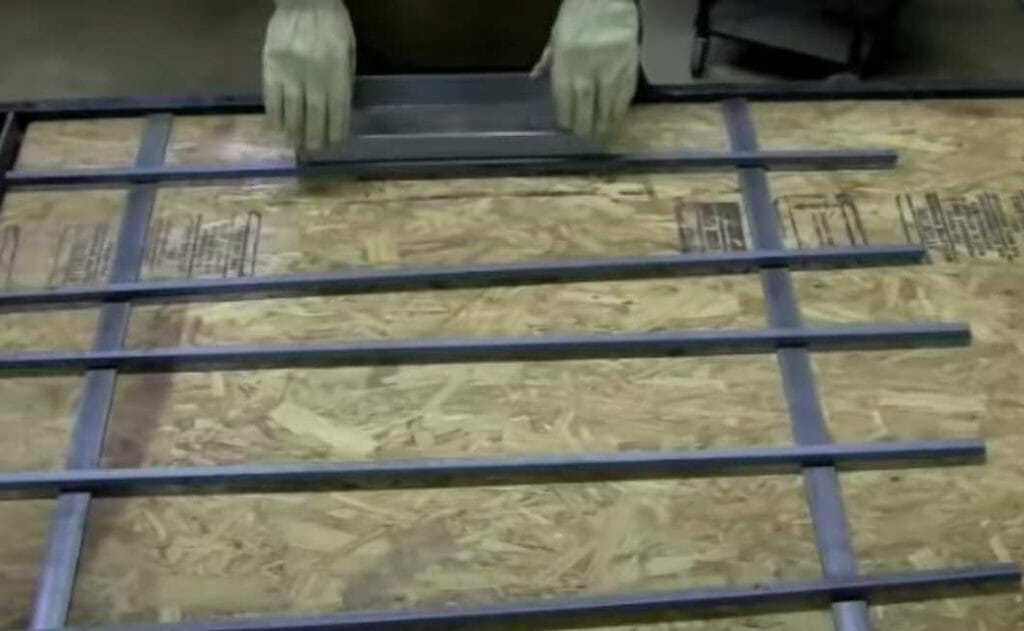
10. Creating And Installing Security Bars On The Windows
For this method, you would need half-inch cold-rolled steel. Take a drill and make holes at the bottom of the bars. Then begin placing security bars one after another, and drill them within the window frame. Secure with security star screws. Once the bars are installed, it would be very hard for anyone to penetrate through.
See the video below:
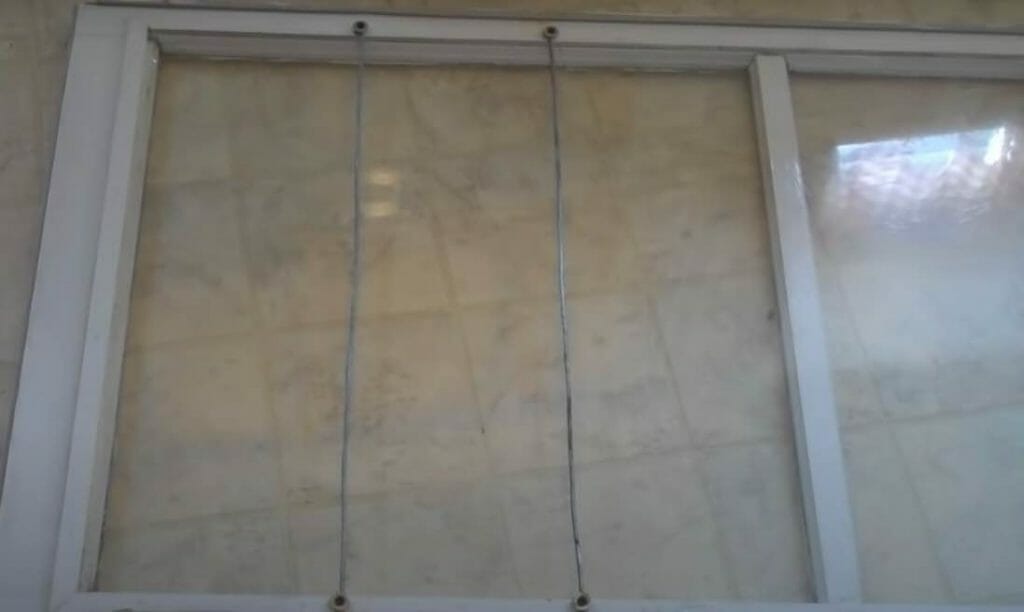
11. Securing Windows
The burglar usually breaks the glass first during a break-in, then unlocks the sash lock to get access inside. They could even attempt to pry it up using a crowbar. To prevent a break-in in such a way, you could take some security measures. Begin by drilling a hole at the point where the sashes overlap. Put a steel window pin inside the hole, which will lock the sashes together.
See the video below:
Wrapping Up
Installing Security Bars can put your mind at ease. You would know that there is no one who could break into your house, with some sturdy bars in place. If you don’t want to choose a sophisticated security system, you can ensure the complete safety of your home through some security bars or by creating a window security unit in the form of a grille.
You could get the materials that will be required in the project from any hardware store at cheap rates, so you don’t have to worry about high costs either. However, be cautious while using the devices that are needed in some of the projects. Only use heavy-duty tools if you have some prior experience in operating them.
References
(1) cylindrical rods – https://www.sciencedirect.com/topics/engineering/cylindrical-rod
(2) paper – https://www.britannica.com/technology/paper
(3) electrical conduit – https://www.lowes.com/n/buying-guide/electrical-conduit-types