Quick Navigation
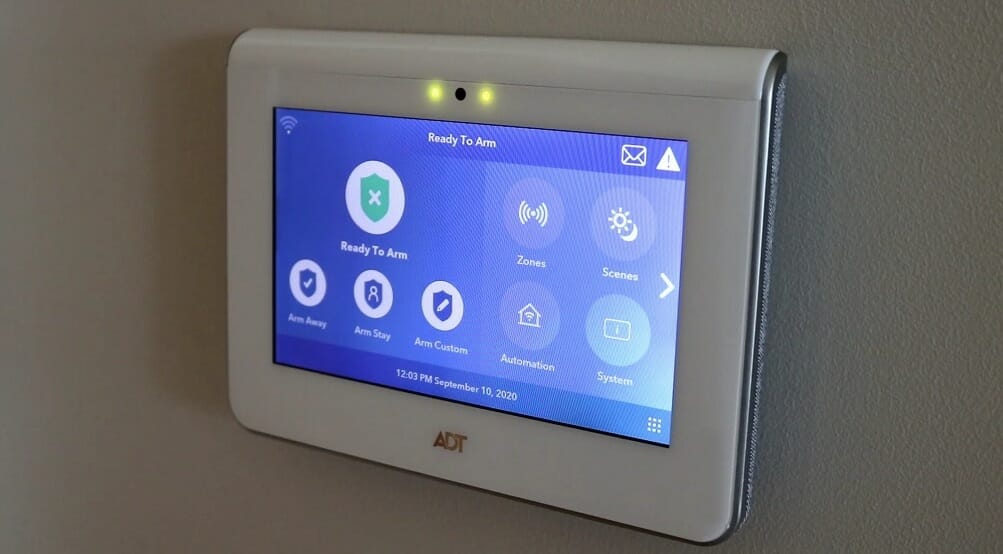
The modern ADT command panel is one of the best security dashboards for your home. Whether you need an ADT alarm system or home automation, users can get diverse security options from this ADT command control panel. ADT recently released their latest ADT security system with touchscreen capabilities. So, you might be looking for a panel replacement. If that is the case, our ‘how to remove ADT panel from wall‘ guide might help you greatly.
To remove the ADT panel from the wall, first, disconnect the panel from the main power supply. Then remove the front cover of the ADT panel. Finally, you need to loosen the screws that are holding the panel to the wall.
Why Do You Need to Remove the ADT Panel?
Whether it is a repair or a new panel replacement, you need a proper understanding of how to remove an old ADT panel from the wall. Apart from these two reasons, here are some common reasons to remove the old ADT panel.
- To replace or check the ADT command panel battery
- Maybe, you want to reposition the ADT panel
- During home renovations or repairs
- An upgrade
A Complete Guide on Removing ADT Command Panel
In this section, we will talk about the process of removing or replacing the ADT panel. First, we will need some tools for this process.
Tools Needed
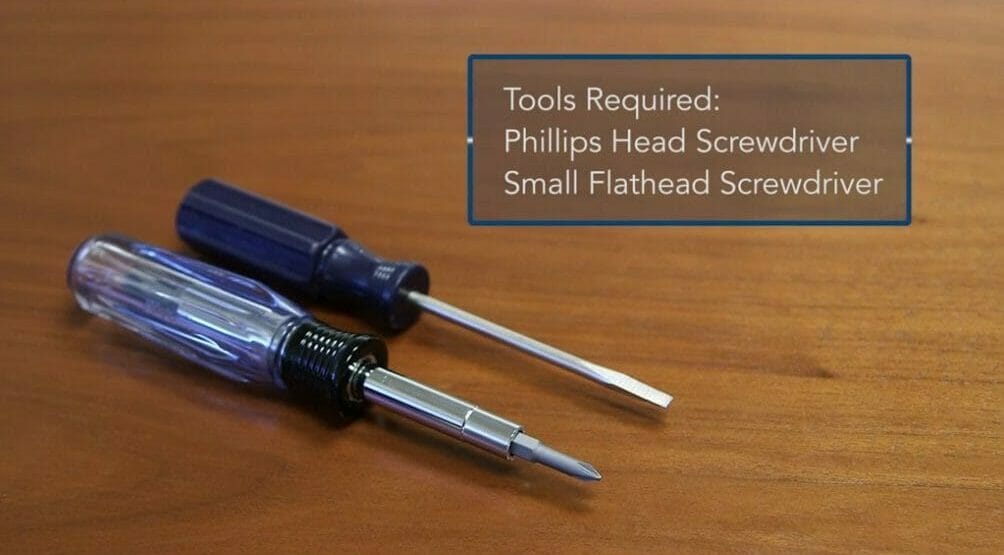
- Small flathead screwdriver
- Phillips head screwdriver
Step 1 – Cut off the Main Power
First, disconnect the main power supply in your home. You should never try to remove the panel while the power is ON. Doing so can electrocute you. Or it could damage the ADT equipment.
Step 2 – Unplug the Cables
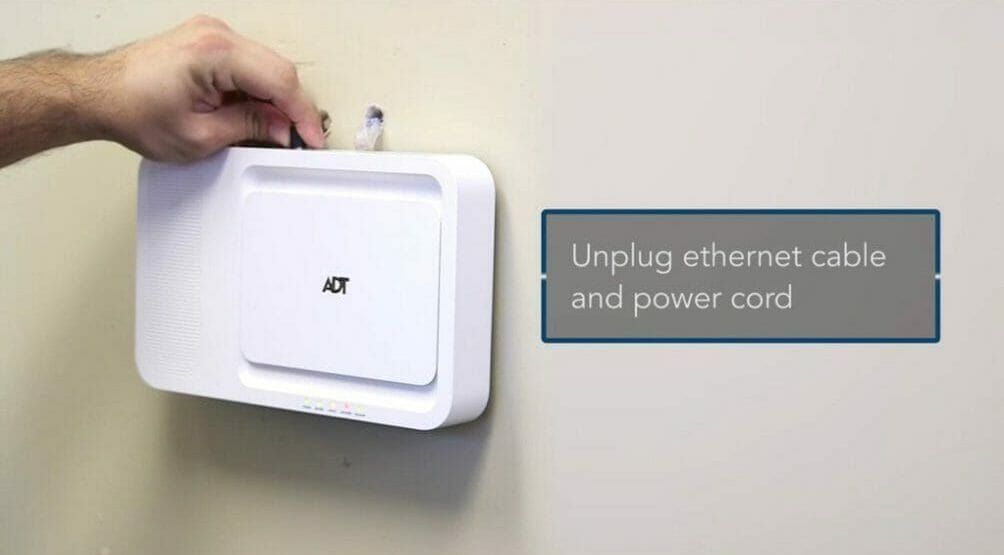
On the top of the ADT panel, you will find two wires; the power cord and the Ethernet cable. Unplug both wires carefully.
Step 3 – Remove the Screw of the Front Cover
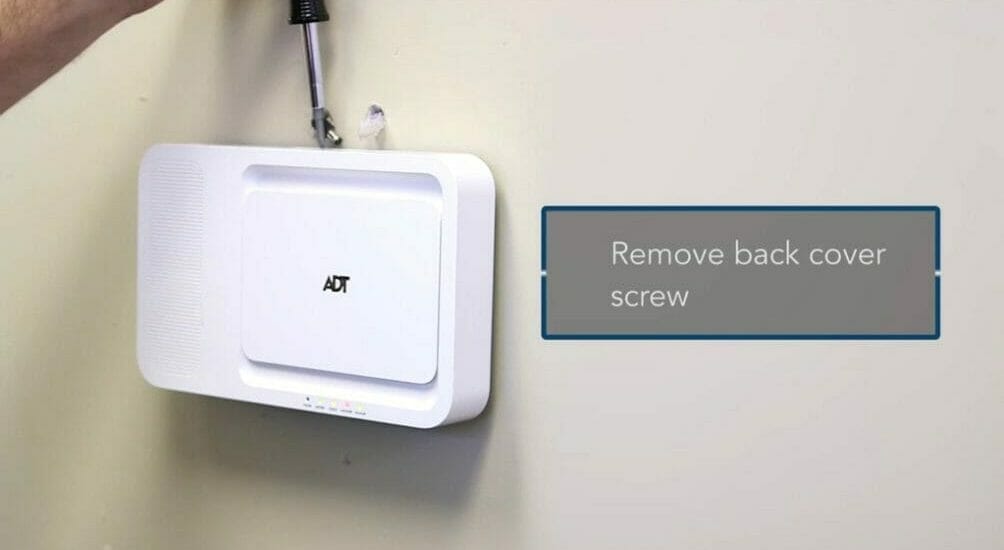
You can find one screw on top of the front cover. Use the appropriate screwdriver to remove it. Then separate the front cover from the ADT panel. It should come out pretty easily.
Step 4 – Remove the Wall Mount Cover
After that, you can see a black cover that has attached to the wall. There should be a few screws. So, loosen them using the screwdriver and pull out the panel. Now you are all set to install your new ADT panel.
Removing the Transformer and the Keypad
In the older model, you can see a transformer and a keypad. If you are looking for a new ADT command panel installation, you might have to remove the above two items too. So, follow these steps.
Step 1: There should be two screws holding the transformer. First, remove them. Then pull out the transformer. Don’t forget to remove the leads from the transformer.

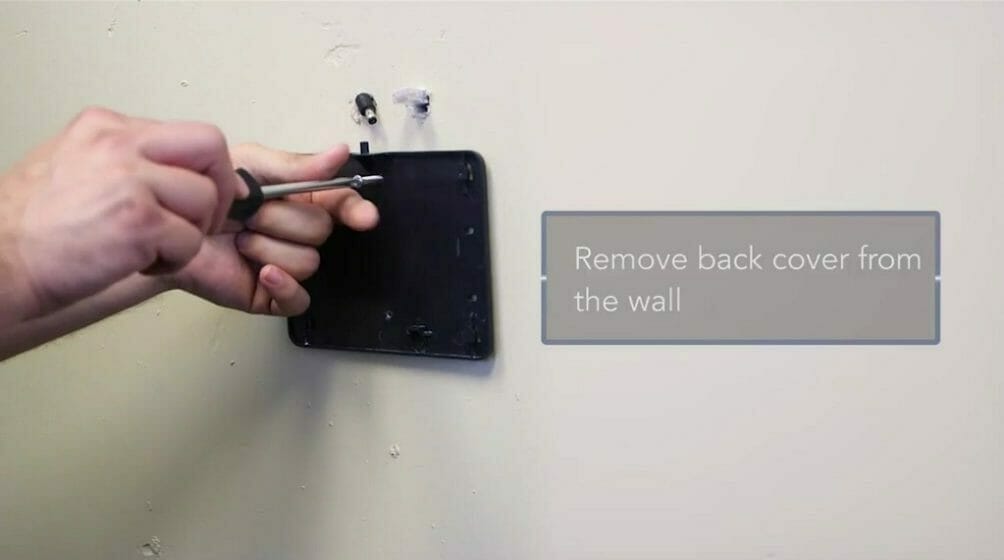
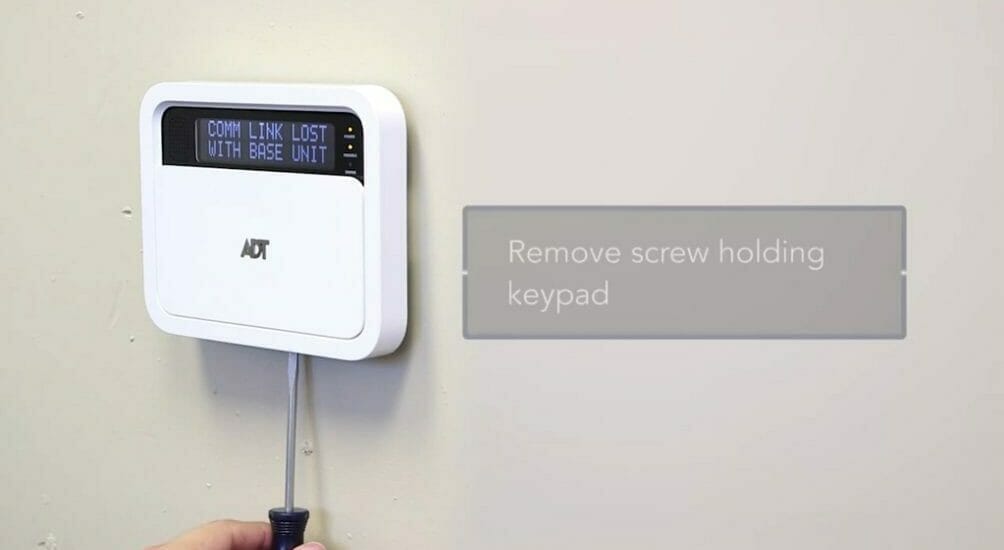
Step 2: You can find a screw at the bottom of the keypad. Remove it using the screwdriver. Then pull out the front cover of the keypad and unplug the power cable. Finally, remove the screws that hold the keypad to the wall and pull out the back cover. (1, 2)
You may also want to check how to reset the ADT alarm panel. Until our next article!
References
(1) keypad – https://www.techopedia.com/definition/7940/keypad
(2) power cable – https://www.sciencedirect.com/topics/engineering/power-cable
Video References