Quick Navigation
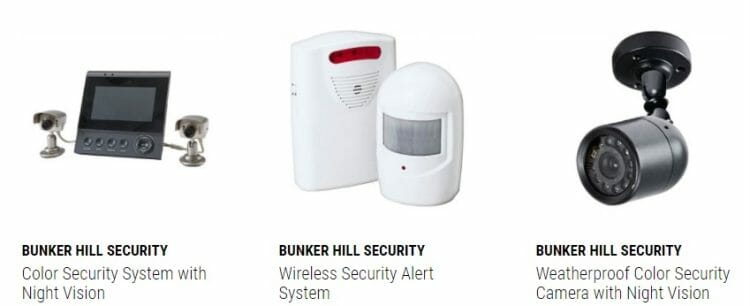
Bunker Hill is a popular security brand produced by the Harbor Freight Company, they have many different models of cameras and most of these have separate manuals.
Below we will give you the links to these manuals and on top of that, we will guide you in using the Bunker Hill security cameras manual to install and activate your security cameras without having any assistance from a professional.
Bunker Hill security camera manuals include a complete guide that details the step-by-step instructions of installing, configuring, managing a whole network of Bunker Hill security cameras as well as troubleshooting steps.
Note: When looking at these codes these pertain to model and SKU numbers which you can find pertaining to your product when searching on the Harbor Freight website or directly on your box. Link to the website to search your code here.
- Bunker Hill Security Camera Manual 62368 – Click To Download
- Bunker Hill Security Camera Manual 60565 – Click To Download
- Bunker Hill Security Camera Manual 61229 – Click To Download
- Bunker Hill Security Camera Manual 62367 – Click To Download
- Bunker Hill Security Manual 62463 – Click To Download
- Bunker Hill Security Camera Manuals H.264 – Click To Download
Bunker Hill Security System Setup
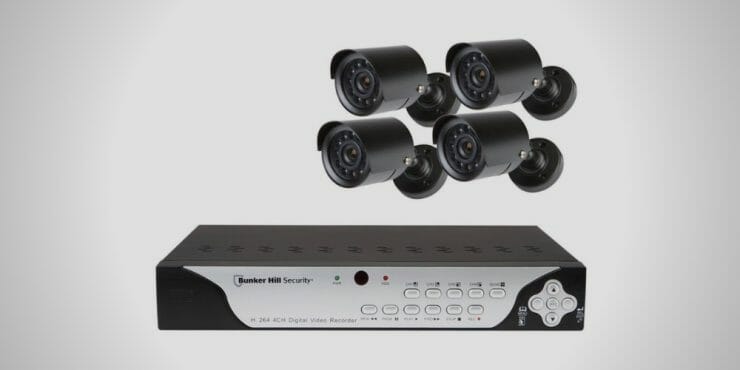
To set up a Bunker Hill security camera, you need to take specific steps to get your camera system to perform at peak performance. The Bunker Hill security camera systems consist of four cables, power supplies, cables, and a digital video recorder (DVR).
The cables the security cameras come with are basic plug-and-play cables which means you wouldn’t have to install complicated BNC connectors that come with other security cameras.
Before setting up, you should try to measure the distance from where you’re setting up the camera because the cables that come with Bunker Hill security camera systems are mostly around 60-70 feet which is short and might not cover up the distance.
Below are the seven steps that will explain the step-by-step instructions of using the camera manual to set up your Bunker Hill security camera.
Step 1. Choose a Perfect Location for DVR
The first step is to choose a perfect location for your digital video recorder. You must remain careful in picking the place. Never forget that exterior walls are difficult to route camera cables through. The reason is simple. These walls contain fire breaks installed inside them in the middle of the walls. Select a wall that gives access to the basement or attic. It is the best thing you can do while running a cable for a security camera since it won’t run through fire breaks located in the outer wall easily.
Step 2. Choose a Perfect Location for Security Camera
The second step is to select a good location for your Security Cameras. It is because you are to route a cable to each camera. So, the best place is the garret or the basement. When selecting a location, you should always make sure to plug in your camera and check the field of view. Doing this will help you choose the perfect location and camera angle. It will also help pick the perfect camera height. Be sure that the security camera is working before moving forward with the installation.
Step 3. Drilling Holes
The third step is drilling holes into the chosen locations of the camera and digital video recorder. Use the bottom or top of the walls to route the cables. You can run the fish tape up from the hole you drilled in the basement or the attic to the hole drilled at the exact location of installing your camera.
Step 4. Pulling Fish Tape
The fourth step is to pull the fish tape out of the hole and tape the security camera cable with the fish tape. Pull the Bunker Hill security camera cable through the basement or attic to the location of your digital video recorder. Then run the other end of the fish tape with the security camera cable connected to it through the hole in the wall you drilled at the digital video recorder. Finally, pull the fish tape, and cable out of the wall. Remove the cable from the fish tape.
Step 5. Adjusting the Camera
The fifth step is to adjust the camera to the required angle before mounting it on the wall. Loosen the bolt in the center of the camera base by using a screwdriver. You should then adjust the camera angle to fit your specifications and tighten the bolt. You should then plug the cable into the camera and mount the camera with the provided screws. You should follow this same process for each security camera in the Bunker Hill security camera system.
Step 6. Mounting the Camera
The sixth step is to mount the camera base to the surface, and you can do this either by peeling the protective paper from the pressure-sensitive adhesive foam pad. It is located on the back of the base and then simply pressing this base onto the surface. You can use screws to bolt the surface base. (1)
Step 7. Plugging the Security Camera Cables
The final step is to plug the security camera cables into the digital video recorder and their accompanying power supplies. Here you need to take proper care. Connect the yellow plug to the video-in port. After this, you have to set a connection. Connect the white plug to the audio port. Finally, connect the back plug to the power plug.
Bunker Hill security camera troubleshooting
Bunker Hill security cameras may break anytime, and the reasons could vary from camera to camera. There are different ways to identify whether the problem is with the security cameras or another component in the security system.
While doing troubleshooting, you might think about replacing the broken security camera with a new one. It will assure you whether the problem is from the camera or the system. You should check for connectivity, power supply, etc. Problems can also be related to video ports.
You can perform the troubleshooting by utilizing the default highlight to reset the digital video recorder back to factory settings. (2)
Wrapping Up
I hope this guide has helped answer all your questions regarding Bunker Hill Security Cameras and their manuals in detailing the instructions for installing the security cameras. Don’t be shy to share it with your loved ones if you found this tutorial a helpful one. They will also get benefit from this.
Harbor Freight also has a list of fake security cameras that you can check. We’ve also listed below some other learning and product guides you can bookmark for later reading.
References
(1) pressure-sensitive adhesive – https://www.sciencedirect.com/topics/engineering/pressure-sensitive-adhesive
(2) troubleshooting – https://www.linkedin.com/pulse/six-steps-troubleshooting-dwaine-rob-roberts