Quick Navigation
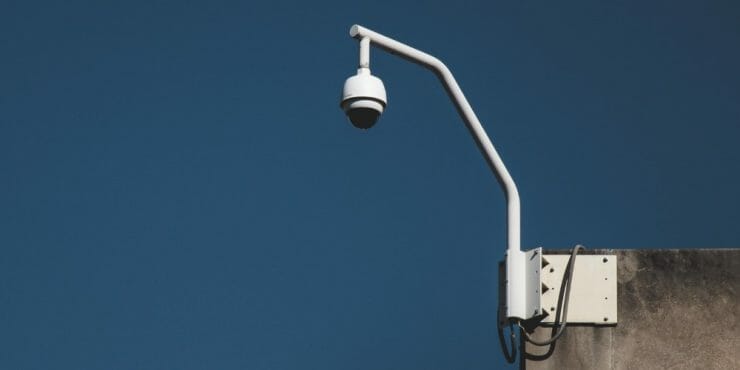
As a security camera installer, a common question I get from people is about saving money on mounting security cameras while still being able to have a visual of a certain space. For example, if you are trying to keep and I on a football field but there is no easy place to mount the camera creating a security camera pole is usually your best option.
Another big problem that mounting the camera solves especially when it’s on a pole is the thread of burglars disabling the camera. By cutting the cords and unplugging the power source, a burglar can easily disable your security cameras. Building your camera pole to keep your security cameras out of reach is one technique to protect your cameras. Here, I will show you seven (7) easy DIY steps to build a pole.
What To Prepare?
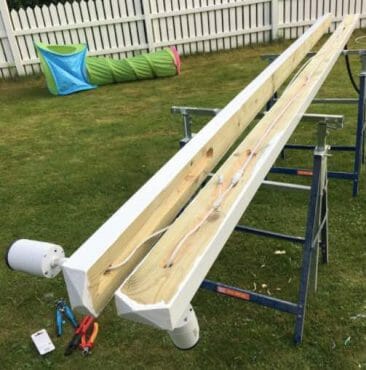
1. Two treaded planks of wood. You will need two treaded planks of wood with the size 5×10 cm for you to build a 10×10 cm pole. You can purchase smaller or larger sizes depending on how big you want your pole to be.
2. Wood router. You may get yourself a wood router to make spaces inside of the wood plank for the hidden cables.
3. PVC Pipe or Water Pipe. PVC pipes are a handy and cheap way to protect your cable wires inside the treated wood.
4. Acrylic anti-rot glue. For you to have a more compact and cleaner pole, you will need to use acrylic anti-rot glue.
Step 1
Start by getting some pressure-treated wood. If you like a 10-by-10-centimeter pole, purchase two 5×10 cm pieces instead.
Step 2
After that, you can use a router to make room for hidden cables within them.
Step 3
If you want it to look more aesthetic, you can paint the outsides depending on the color you want.
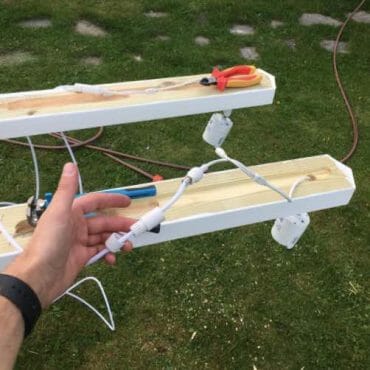
Step 4
You can start installing the cameras by drilling holes from the outer edges into the inside. Then finish the wiring on the inside before sandwiching the two pieces together to close the pole.
Step 5
Use screws that are long enough to seal the parts together after pre-drilling holes. You should ensure that it’s working and proceed with putting acrylic sealant in the joints.
Step 6
To protect the CAT6 cables, I highly recommend that you invest in PVC pipes. They don’t cost that much and are very straightforward to install. You may combine numerous items with ease using water pipes. They can also be dug into the earth. (1)
Step 7
After ensuring that everything is functioning, seal it with acrylic anti-rot adhesive.
How to Build Security Camera Wood Mounts in 11 Simple Steps
If you have gotten this far the next step was going to go through is building the security camera mounts or pods. These mounts are a nice alternative to the security camera pole or can even be a mount that you install on top of the pole. Whichever way you choose to use them they are essential to actually getting the security camera up there.
Materials Needed
- Pan-tilt type of security camera
- Solar charging system
- Pressure-treated wood
- Two long types of screws
- Five short screws
Step 1
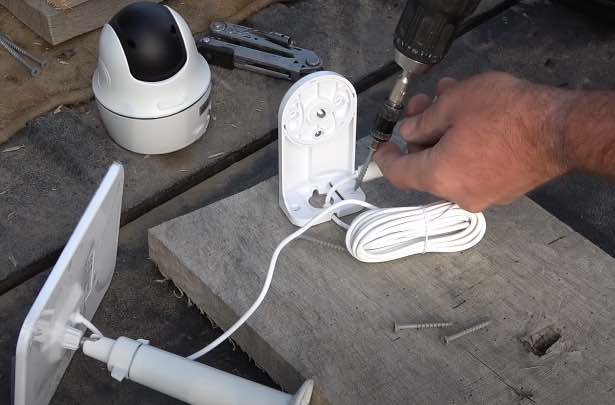
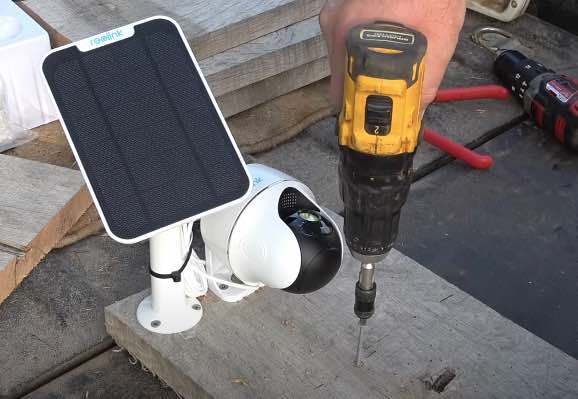
You can start by screwing off your camera from the hanger and remove the antenna.
Step 2
Get your solar panel and ran up the wire through the index of the camera hanger.
Step 3
Mount and screw your camera hanger with the solar panel wire through pressure-treated wood. You may buy a six-foot piece of the decking board and cut it into the sizes you prefer, or you can use a piece of a scrap of pallet wood instead.
Step 4
Once you finish screwing the camera hanger-on, you may start attaching your solar panel.
Step 5
Next, you should remove the solar panel from its mount. You may position the solar panel’s mount to the side of the camera hanger.
Step 6
Screw your solar panel’s mount to the pressure-treated wood.
Step 7
After you screw everything on, you can start attaching the solar panel to its mount. You will need to face the solar panel to where it can obtain maximum sunlight.
Step 8
You can use a zip tie to tie up the extra wires of the solar panel.
Step 9
Finally, you may start screwing your camera into place. Do not forget to plug up the power chord into the camera.
Step 10
After that, attach the camera’s antenna.
Step 11
Now, drill two holes on the pressure wood. And take and prepare your extra-long deck screws.
And now you have made your own security pod; you can mount it to a high place and have that extra level of security where someone would need to get up there to disable your camera. I highly recommend that you put it up out of reach like a tree or somewhere higher.
To Buy or To Build? (Advantages and Disadvantages)
Buying a camera pole could be the fastest solution. However, it comes at a premium price.
Advantages of Building a Camera Pole
- When it fails due to various weather conditions, you can immediately replace it.
- You can easily increase its height or reduce it without paying for a new product.
- It is less expensive than having it installed by a professional. It is far less costly to build your own home security systems than hire the services to do it for you.
- There are no agreements to sign or subscriptions to pay for equipment. Aside from your device’s power consumption, you will not be needed to sign a long-term agreement or pay a monthly fee. (2)
Disadvantages of a DIY Camera Pole
- Making repairs is your problem. You are typically on your own when you create a DIY system. You are both responsible and liable for any upcoming repairs and charges.
- The functionality may be limited. These devices are prone to be installed incorrectly. Be more mindful and follow the steps provided above to install it successfully.
A Few Things to Keep in Mind
Always put the solar panel nearby so that it can provide shelter to the camera. Your solar panel needs to face south so it can obtain maximum sunlight.
Bear in mind that this does not stop thieves from breaking into your property. However, it can deter robbers from actually stealing something.
If you’ve made it this far was really excited at the prospect of your new camera Paulette mounts always keep in mind that do-it-yourself projects while fun does have the risks of not being properly executed so you may want a professional to double-check your work.
Check the video below for reference;
Other links to check;
https://imgur.com/a/c02iA
https://www.reviews.org/home-security/can-burglars-cut-alarm-systems/
https://www.statista.com/statistics/191139/reported-robbery-cases-in-the-us-since-1990/
References
(1) PVC – https://www.britannica.com/science/polyvinyl-chloride
(2) subscriptions – https://stripe.com/docs/billing/subscriptions/overview