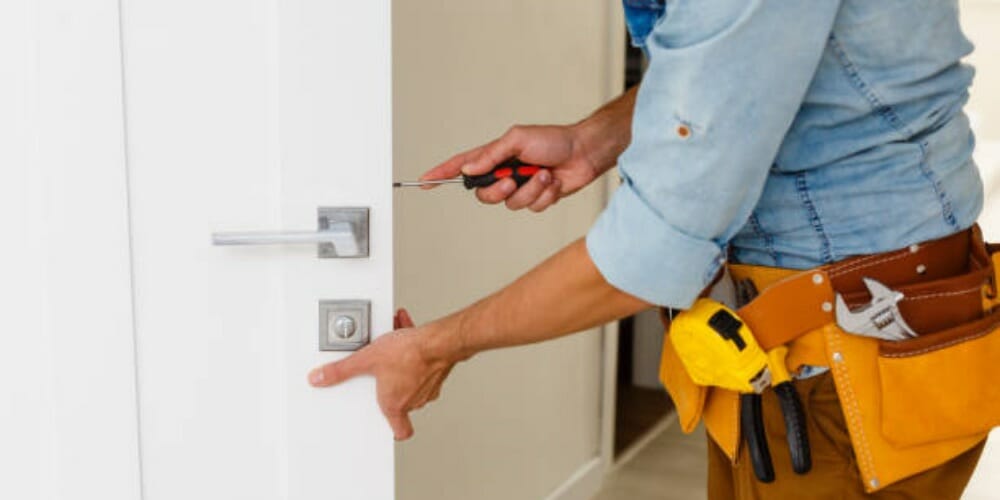
Replacing a door lock set is essential when you move into a new apartment, get a new roommate, or get your house burglarized. Changing your door lock is also a great way to improve the aesthetics of your door.
So, whether you work in the security field or you just want to replace your lockset, we’ll show you the step-by-step guide on how to replace a door lockset.
You can replace your door lock set using three different and simple methods below.
- Replace the knob on your door
- Rekey a lock in your door
- Replace the deadbolt on your door
Replacing the Knob on Your Door
If the goal is to replace your doorknob, these steps will guide you from start to completion. Here are the steps to complete the door lock installation:
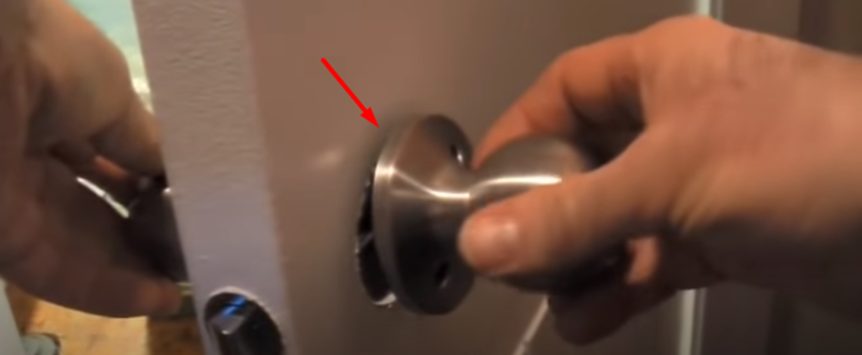
Step 1: Locate the old lock from the inside of your door and use a Phillips head screwdriver to remove the screws. You will see two to three screws on the inside knob plate. When you are done removing the screws, pull each side of the doorknob away from the door to remove them.
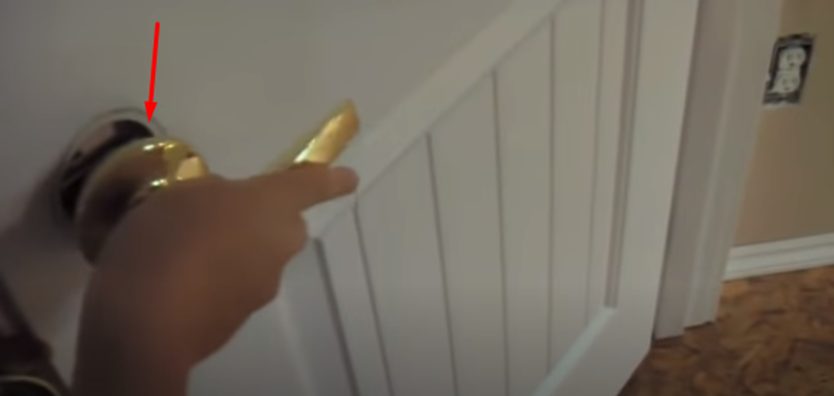
Step 2: Insert the screwdriver into the tiny hole on the doorknob side to release the knob latch. Now pull out the knob.
Step 3: Check the brand of lock you currently have on the door and buy a set that matches it. If you can’t find the actual brand, measure the lock hole’s diameter and the space from its edge to the center of the door and buy a lock that matches it.
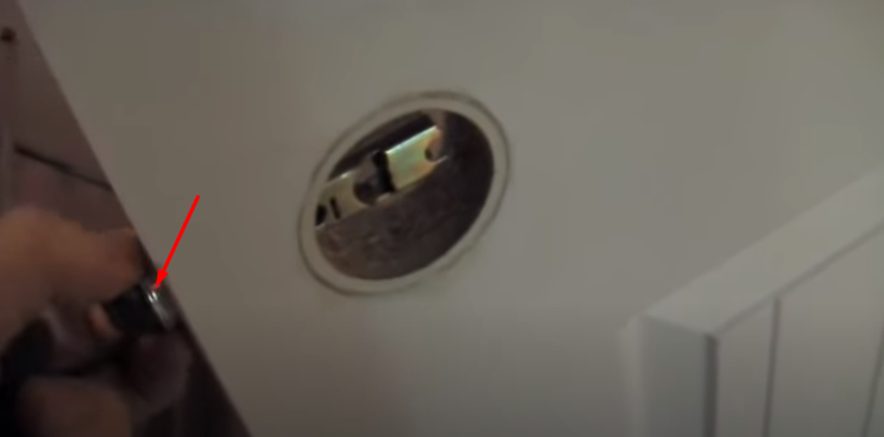
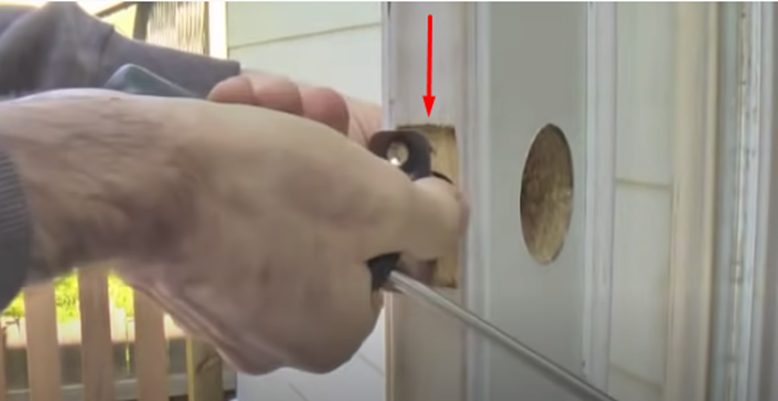
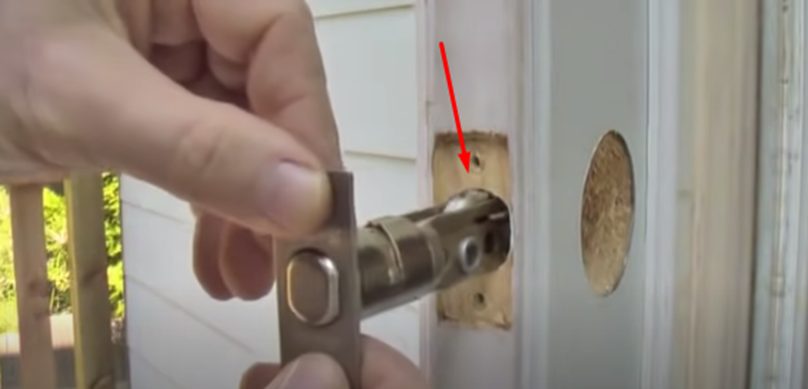
Step 4: The final piece to remove is the latch. Remove the two screws holding the latch plate. Carefully slide out the latch from the opening on the side of the door after removing the screws.
Step 5: Your new lock will come with a paper template that indicates how the lock will fit into the door. Bring out the paper template and cover the hole on your door with it. Ensure that the template matches your door. (1)
If it doesn’t, then it is the wrong lock. You need to return and replace it. You can take the old lock along to the store and ask the store owner to help you find the perfect lock that will fit.
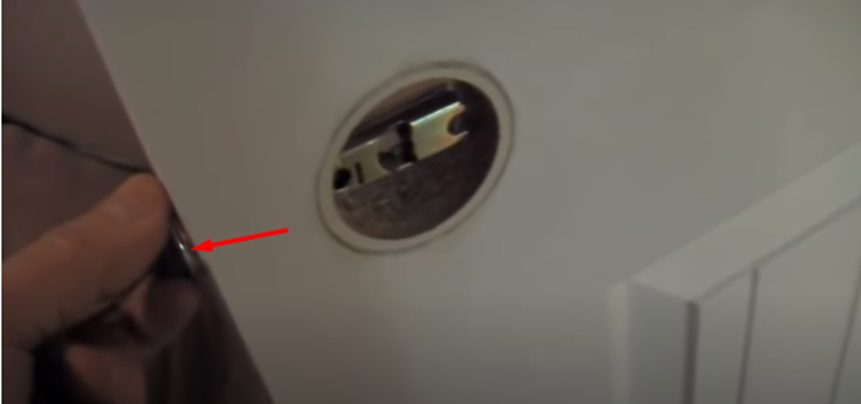
Step 6: To start the installation, slide the new latch into the opening at the edge of the door and screw it in with the new screw. Ensure you secure the latch firmly. It is recommended that you don’t use the old screws because they might be weak.

Step 7: Now put the outside knob with the keyhole and the inside knob on the right sides and slide them towards each other through the lock hole. Make sure they connect in the middle without forcing it. Let them slide easily together and connect.
Next, screw the doorknob plate into place through the holes. That’s all! You have successfully replaced the lock.
Rekeying a Lock in Your Door
The first thing to do is to buy a kit labeled for the brand of your lock. You will find a rekeying kit with the necessary tools that you need online or in your local hardware store. It is worth mentioning that a certain brand of kit doesn’t usually work for another.
Therefore, check the brand of your lock and buy a kit that perfectly matches it. Before you start, read the instructions on the kit to know what to do. When you are done with this, it’s time to get busy! Let’s check out the steps:
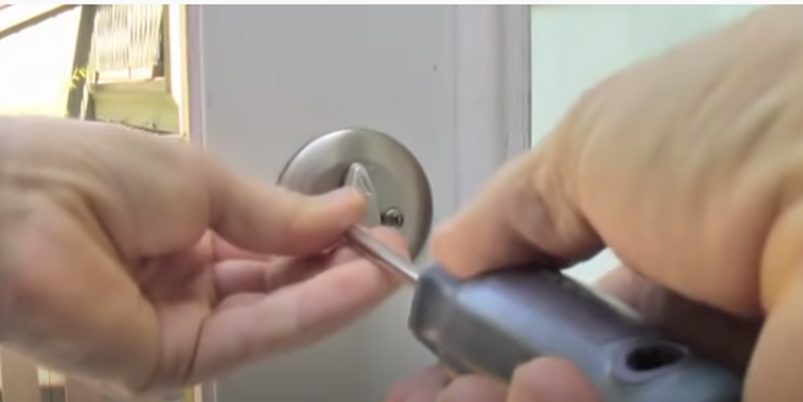
Step 1: Insert the original key into the keyhole and unlock the knob. Turn the lock counterclockwise and locate the tiny hole at the side of the doorknob. Insert the key-like tool from your kit into the tiny hole and press it down to release the knob. Using the pop and turn technique, remove the knob.
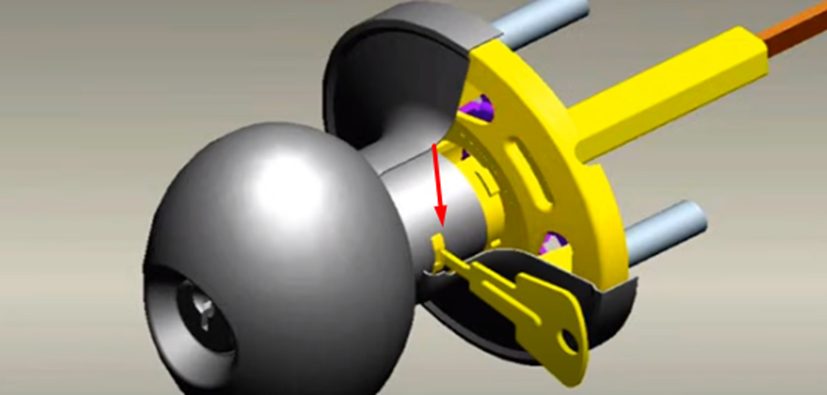
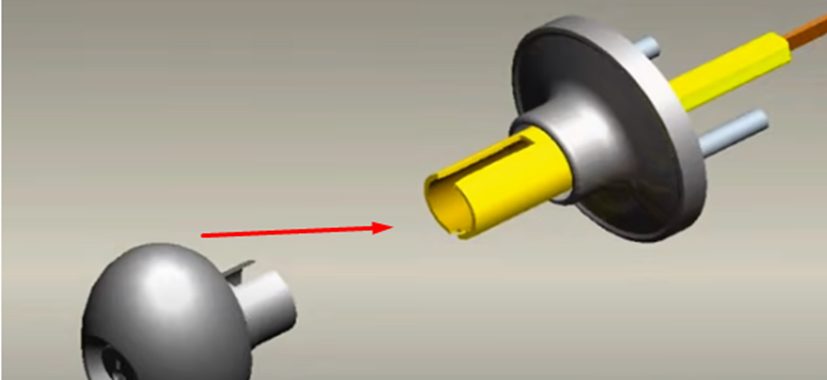
Step 2: Use the spanner tool to lift the cap from the knob and then remove the cylinder. Next, use the spanner to push out the retainer ring holding the cylinder. Now hold the cylinder tightly to keep the cylinder plugs in the housing and insert the original key again. Turn the key to about 45 degrees.
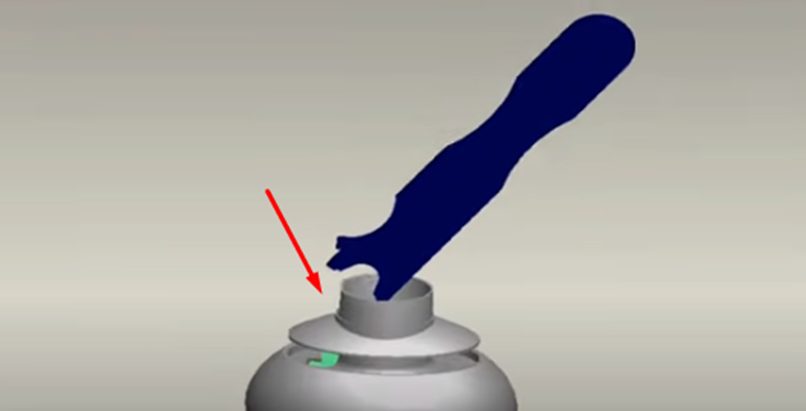
Step 3: Insert the white plastic that comes with your kit and push it to the back of the cylinder and push the cylinder plug all the way out of the cylinder. Apply pressure on the tool and plug to keep both in contact and to prevent the springs and pins from popping out and flying all over the place.
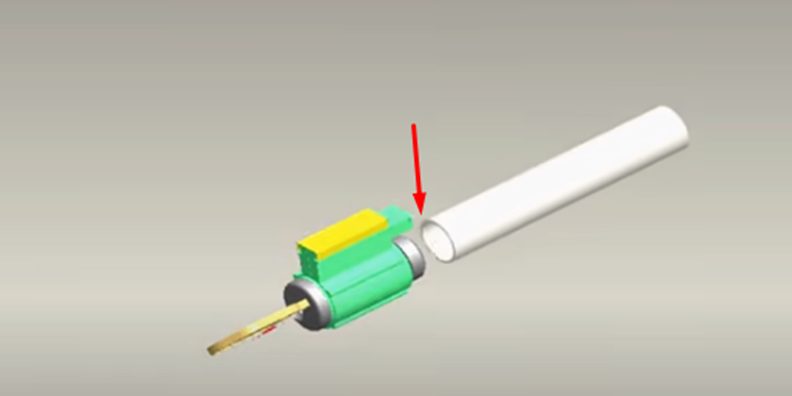
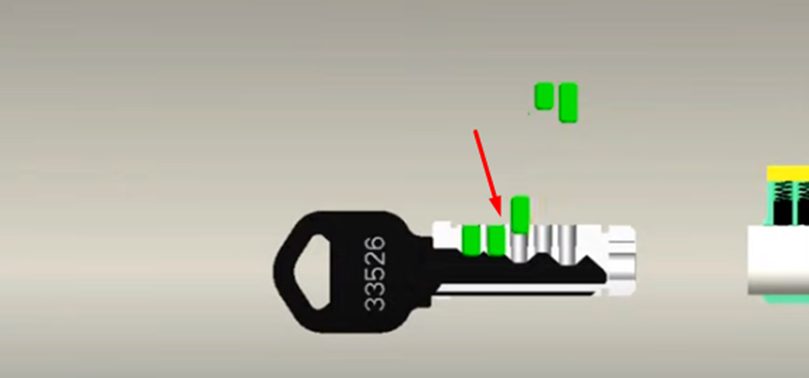
Step 4: Slide out the bottom pins from the cylinder plug. Now insert the new key that comes with the key into the plug and then drop the new pins into the plug. Ensure that the pins match the color or number of the code.
Now insert the new plug with the new key into the cylinder. The plug will push out the white plastic follower. Maintain the right pressure on the plug to get the follower out.
Step 5: Now replace the plug to the cylinder housing and slide the retainer ring into place. Turn the cylinder back into the doorknob and replace the metal or plastic sheets to secure the cylinder. Now push the outside of the lock back into its place in the lock and turn the key until the knob locks in place. (2, 3)
Step 6: Remove the key and place the cylinder back in the knob and then press the cap back into its place. Align the cap with the knob with the chain and replace the knob. Push it back in place until it snaps into position and engages the catch.
Replacing the Deadbolt
This is another method you can use for your door lock installation. Here is the step-by-step guide to using the method:
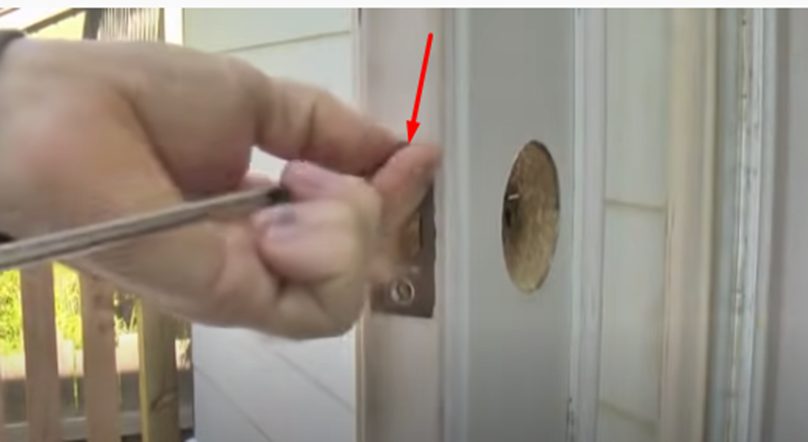
Step 1: Unscrew the screws from the interior plate and rotate the plate counterclockwise to pull it out from the door hardware. You can also pull the inside faceplates out directly. Next, twist or pull to remove the outside plate. Make sure you hold the exterior faceplate in place when removing the interior faceplate.
Step 2: Next, remove the screws on the plate and bolt at the edge of the door, and pull out the bolt and plate.
Step 3: After removing the deadbolt, pull out the cylinder housing from the outside faceplate to rekey it like you would rekey a knob lock. You can also change the entire deadbolt and replace it with a new one.
Step 4: If you’re replacing the lock, first insert the bolt into the hole at the door’s edge where the old bolt was once fastened. Now install the new screws through the new set plate and directly into the door. You may need to buy a new set of screws if the new lock doesn’t come with some.
Step 5: Now align the new interior and exterior faceplates on the appropriate sides of the hole. Drive the new screws into the screw holes of the inside plate and let them go through the screw holes on the bolt and then the exterior plate. Tighten the screws to complete the installation on the door hardware.
There you have it! This post looks at how to replace door locksets through three different methods. When next your door lock set develops an issue, you have the guide to help you fix it.
Take a look at some of our related articles below.
References
(1) paper – https://www.britannica.com/technology/paper
(2) metal – https://www.britannica.com/science/metal-chemistry
(3) plastic – https://www.britannica.com/science/plastic
Video References
Toucan DIY – Video 1
Fu Hsing Americas
Toucan DIY – Video 2